The Importance of Evaluating Surface Roughness When Taking Dimensional Measurements in MRO
Key Highlights
- Surface roughness impacts aircraft performance, longevity and aesthetic appeal by affecting fluid flow, air flow and coating adhesion.
- InSpec surface gauges provide portable, high-speed, non-damaging measurements suitable for various textures and environments directly on the shop floor.
- Shop-floor gauging enables immediate feedback, improves yield and enhances customer satisfaction by providing reliable, repeatable surface assessments.
Analyzing surface roughness when taking dimensional measurements is a key way to ensure proper finish on aircraft and preserve airworthiness and longevity, though it isn’t always done in the most effective way.
These sentiments were shared in an Aviation Week webinar called, “Accuracy of Shop-Floor Measurement of Roughness, Defects, and Small Geometries” by Erik Novak, vice president of 4D Technology.
Throughout the webinar, Novak discussed best practices for dimensional measurements along with modern solutions for improving processes and results.
Why is surface roughness important to measure in aviation maintenance?
Novak explained, “Even parts that typically won't have defect call outs will have surface finish call outs, and roughness needs in manufacturing range from about 1.5 microinches or 50 nanometers up to a few micrometers, or 100 or so microinches for average roughness. And that can be more roughly finished parts, even some cast parts.”
When talking about evaluating surface roughness, Novak said, “Instead of having a noise floor on the order of a tenth of 1000 or a few microns, we're talking about getting down into the nanometer, 10s of nanometers regime, or 40 or so micro inches regime, as we start talking about surface roughness. Unfortunately, one tool can't do quite everything, but we designed something philosophically that works very similarly.”
“And here, you need really fine lateral scales,” added Novak, “Instead of a few micrometers, we're looking for sub-micrometer lateral scales to get the high-frequency finish content, and finish will affect friction and wear. It can initiate fracturing if it's not right.”
Novak also shared some ways that an improper finish can reduce the longevity as well as aesthetic appeal of an aircraft, such as:
- Fluid flow
- Air flow
- Adhesion of coatings and lubricants
Why use 3D optical metrology to measure surface roughness?
On the significance of applying 3D optical methods for measuring surface roughness, Novak said, “3D optical roughness has a lot of benefits against two-dimensional or stylus systems. The results are independent of part orientation. That's probably one of the big ones.”
He continued, “Most machining operations have a preferential treatment in terms of where the finish is rougher in one direction versus the other. With a three-dimensional measurement, you don't have to worry about that.”
“You can see a variety of surface finishes there that can lead to different practical issues in the part like leakage, high friction, noise and other things, and they offer short courses and things that will teach you everything you ever need to know about three-dimensional measurements,” added Novak.
Elaborating on the specific advantages of this type of measurement, Novak shared how it allows users to measure into corners and up to the edge of a part without having to be concerned about the stylus going off the part or breaking.
He shared, “You get three-dimensional ISO-compliant S-parameters, which are the 3D equivalent to the R-parameters that most people from the stylus world are familiar with. There are many of those S parameters, and they capture real data about friction and peening coverage and do a better correlation to practical good or badness of parts than you would get from a single stylus trace.”
Novak highlighted the data and record-keeping benefits associated with this, noting, “Plus, you get a full digital fingerprint with those parameters, even if you're not using them today. Save the data, save the S-parameters, and if you see a problem in the future, you can examine them and see if one of those more comprehensive parameters changed.”
“And then you can implement that without doing a whole new study on what's going on, use your digital fingerprint and improve your production with minimal issues. You get higher repeatability with more data,” said Novak.
What are challenges in 3D roughness measurement?
Novak explained, “One of the challenges in validating a 3D roughness result is that stylus results are so inconsistent. With an optical system, you get more than 4 million data points.”
He continued, “And if you laid out each of the lines of data. It's like having a four-meter, 13-foot trace across a part. You get enormous amounts of sampling, which gives you confidence in your results. And it's non-destructive. There's no part moving against your feature that you're trying to measure.”
What is 4D Technology’s solution for measuring surface roughness defects?
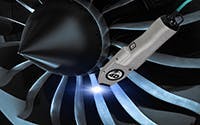
One of the solutions Novak highlighted in his presentation was 4D Technology’s InSpec surface gauges, which allow technicians to take accurate measurements on the floor with a portable, handheld device.
Novak explained, “The goal of the InSpec SR for surface roughness is to bring measurements, again, right to the part. There's a version that looks downwards. There's a version that looks out the nose of it. It's ruggedized and measures components directly. The thought is it’s easy to use: hit the Measure button, walk away, get your result.”
He continued, “And you have flexibility in how you implement it. It can be on a robot. It can be on an armature that gets right to the part…you can have it upwards, looking at its case, and just set parts on the case over the aperture, take a measurement, get your surface finish and set the next part on.”
“It's designed for high-speed production and to be non-contact, non-damaging of parts. And it can measure pretty much any texture or shininess,” said Novak.
He then listed some common applications for the InSpec SR, such as:
- Scratched parts
- Silicon wafers (polished or unpolished side)
- Shot peen surface
- Rubber
- Glass
- Plastic
When asked how the systems are calibrated, Novak answered, “They're calibrated against certified standards. We have ISO-lab-certified height standards, and the InSpec is certified across a wide range. So, you get accuracy, not as a single step, but actually on steps from about 50 micrometers tall all the way up to 900 micrometers tall.”
“It's linear over its range, as well as accurate. On the roughness side, we use a three-dimensional certified roughness standard of about one micron average roughness to calibrate that instrument,” added Novak.
He proceeded, “And because there's no moving parts associated with the end result, the calibration is very stable. It only needs to be recalibrated every six months or when your QC department would require it, rather than worrying about daily recalibrations.”
Why should organizations measure surface roughness while on the floor?
Novak explained why taking shop-floor measurements is crucial, sharing, “Shop floor gauging really is highly beneficial, particularly in the aviation world. It’s easy to use. You don't have to move the part into a lab, you bring the measurement to the part.”
He continued, “You're not replicating something. You're not squishing something against it, hoping that it penetrates the features. You get instant feedback in manufacturing or repair operations. It’s non-destructible with no consumable parts. Just measure forever.”
“You measure near edges, near curves,” added Novak, “You can use fold mirrors on some of the systems to get into tight spaces. Results are independent of orientation, and with huge sampling areas, you get consistent results that are reflective of the whole part, not just where you happen to measure.”
Novak concluded, “You don't guess if you got the deepest part of the pit or the deepest part of the scratch. And the end result is your yields go up, customer satisfaction, confidence, internally and externally, go up and you're going to reap the benefits.”


