Maintenance delays and unexpected downtime costs the airline industry an estimated $8 billion per year, and nondestructive testing is one significant component for reducing time delays and costs. As more advanced, connected equipment is introduced into the aviation industry, a major challenge for aviation organizations is to ensure that the methods used to inspect their critical assets are as advanced as the new technologies themselves.
Aircraft engine production, for example, is particularly complex and demanding. Today’s components are precision crafted to tight tolerances, using high performance materials and additive manufacturing techniques. These components not only require rapid and exact inspection results to maintain safe and reliable aircraft operations, they demand new methods of inspection.
The digital drivers behind emerging inspection technologies and methods are transforming the NDT industry and providing aviation organizations with the needed assurance that aircraft will experience only necessary and minimal downtime. The top three advancements include: three-dimensional (3-D) computed topography (CT), new visual inspection borescopes, and connected mobile, user-interfaces that appeal to the next generation of industry inspectors.
These technology transformations have issued in a new era for NDT and maintenance practices in aviation.
From the hospital to the manufacturing floor
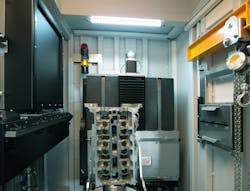
Recent automation, speed, and accuracy developments are driving the migration of CT technology into advanced manufacturing. Imagine a turbine blade manufacturer being able to fully examine and measure parts during the production process, or a manufacturer of 3-D printed parts being able to check for defects in complex internal structures in real time. CT can now be used as a powerful quality control and process optimization tool, providing fast inspection and accurate 3-D measurement of components which are difficult to examine by conventional two dimensional (2D) radiography or coordinate measuring machines (CMMs).
2-D radiography has its limitations when dealing with critical machinery in the industrial sector. It is sometimes unable to detect, localize, or visualize the indications and internal geometries found in many of today’s complex engineering components. 3-D CT can effectively inspect metals, composites, plastics, and additives manufactured or 3-D printed parts with complex internal structures.
Additionally, previous CT operational speeds were slower and limited the number of parts that could be inspected to only a few per shift. Advances in scan time, part manipulation, workflow, and software now allow many more scans per hour – approaching full production inspection and drastically shortening the downtime window for manufacturers and operators. This makes CT technology a viable inline inspection solution for processes previously dominated by visual, ultrasonic, or 2-D X-ray techniques.
CT analysis also assures product quality, enabling real-time process optimization, and potentially consolidating inspection steps. High quality 3-D CT scans and metrology allow manufacturers to compare completed parts to specifications and tolerances with a high degree of accuracy. Automated defect recognition (ADR) software can speed and simplify the pass/fail decision for operators. The increasing speed and production-readiness of CT now allows manufacturers to sample a larger percentage of parts and process the results quickly, resulting in improved yields, quicker changeovers, and reduced scrap or waste.
With 3-D data sets available, manufacturers can even replace steps previously analyzed with various technologies. For example, it has been routine to inspect parts multiple times with 2-D radiography for casting defects and residual materials, and to also use ultrasonic measurement for wall thickness, and even a CMM for external measurements. Most of this could be replaced by a single, highly reliable 3-D image.
The 3-D application of CT for industrial inspections will significantly improve the accuracy of indications, keep machines in operation longer, and ensure that quality control for production process optimization becomes more precise and effective.
Advances in visual inspection
While CT has improved the inspection process for complex aviation parts, other modes of inspection for remote technicians on the flight line have also entered the digital age. Today’s advanced video borescopes are equipped with 3-D measurement technologies and wireless connectivity and collaboration software to capture and connect remote field inspectors to analysts via secure internet connections.
Traditional borescopic-measurement approaches involved capturing a 2-D image using a measurement tip and positioning cursors on that 2-D image to perform the measurement, but this had drawbacks. The measured depth of a dent at the root of a blade can be drastically affected by the cursor placement due to the curvature of the surface, which is difficult to assess from a 2-D image. These limitations could lead to unnecessary engine removals or continued operation of assets with out-of-limits indications. An engine removal alone costs about $100,000 to execute, not including lost revenue if no replacement aircraft is available.
The 3-D surface maps produced with today’s borescope systems generate a 3-D point-cloud visualization, or point-cloud view, of the 3-D data that underlies the computed measurements along with the cursor locations on the 3-D surface. This allows the inspector to make several critical accuracy checks that are difficult or impossible to make using the 2-D image alone. Inspectors are now transitioning to borescopic-measurement technologies that provide this capability, including 3-D Phase Measurement (3DPM) and 3-D Stereo Measurement (3DST).
Not only are these measurement technologies more accurate and reliable when identifying flaws, advanced software and wireless connectivity allows senior inspectors to provide direction and feedback to field inspectors from their desks, reducing costs and downtime.
The rise of a mobile and connected workforce
Mobile, connected technologies are transforming the way inspectors collaborate and share timely data. In the past when critical assets depended on accurate measurement and experts were located across the world, a second opinion involved physically transporting the expert to the site, extending both downtime and lost productivity. Further, flight line inspections were slowed by cumbersome paper procedures and manual data transfer. Now measurement tools are digital and second opinions are a simple video conference.
Consider an aircraft that had been grounded at a remote airport for foreign object damage. The inspector identifies an indication inside the engine, but is unsure whether it’s serious enough to take the plane out of service for an engine overhaul. Needing a second opinion, the inspector initiates a live inspection session with an experienced inspector and the fleet maintenance supervisor at their home shop. The experts access the session from a laptop computer and project it onto a conference room screen so several people can look at the damage and weigh in on the decision. They direct the inspector in real-time to look at the indication from several different angles and conduct a depth measurement of the indication using 3DPM, a technique that combines bright, full screen viewing optics for general inspection with on-demand measurement upon finding an indication. Ultimately, they conclude that the indication is within acceptable tolerances and release the aircraft to return to service. By avoiding an unnecessary repair, the team saves tens of thousands of dollars and several days of downtime.
As skilled, experienced inspectors retire along with their extensive knowledge of flaws, cracks, and the industry maintenance regulations, less experienced inspectors need more exposure to both the process and the experts in the field. Collaboration tools are not only familiar to this next generation of inspectors with smart phones and various digital devices, they also help them quickly acquire the skills needed to do their jobs.
These tools can connect less experienced inspectors directly to remote experts while they are in the field inspecting various aviation parts so that they can receive invaluable live coaching and training. They can also verify the measurements they are making and run decisions or questions by the team supporting from the office. New devices streamline the data sharing, analysis, and reporting process and help inspectors make better decisions, save time, and share best practices.
As the aerospace industry pioneers new advanced manufacturing technologies such as lightweight composites and additive manufacturing, inspection technologies need to continue to evolve to be equally effective and efficient. 3-D CT provides aerospace manufacturers with the best and sometimes only viable inspection method for advanced components. Advances in CT speed and operability are bringing the technology closer to the production floor for a wide range of industrial applications, both in defect detection and in metrology. For flight line inspections, advances in user interface and connected software enable live-streaming and remote collaboration so that global teams can respond faster and provide technical expertise, saving precious days and hours.
Alan Metzger is a key account manager with GE Inspection Technologies, specializing in the aviation industry.


